Open a terminal
Open a shell in your project, choose the default shell, and save terminal profiles.
A new terminal starts in the folder of the active project. If you work in a worktree, it starts in that worktree's folder instead.
Open a terminal from the tab bar
- Select the + button at the right end of the tab bar. Its tooltip is New tab.
- Under Terminal, select a shell.
The terminal opens as a new tab in that pane. Each pane has its own + button, so you can open a terminal in the pane where you want it.
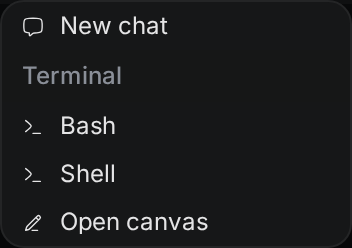
The same menu also starts a chat (New chat) or opens the project canvas (Open canvas). In the desktop app it also has New browser tab.
Other ways to open a terminal
- Select Terminal in the bar at the bottom of the window. The terminal opens in the active project or worktree folder.
- Press
Ctrl+Shift+Alt+T(Cmd+Shift+Alt+Ton macOS). In the keyboard shortcut list, this shortcut is called Open Terminal in Worktree. It also works when you are not in a worktree. - Open the command palette with
Ctrl+K(Cmd+Kon macOS) and run New Terminal. - In the Explorer, right-click a folder and select Open in Terminal. The terminal starts in that folder.
- In the Chats list, right-click a chat and select Open Terminal Here. The terminal starts in the chat's folder.
- Open the Workspace menu at the top of the side panel. Each folder in the list has a terminal button. Select it, or right-click the folder and select Open Terminal Here.
Which shells you can pick
The Terminal group lists the shells that Termul finds. In the desktop app, these are the shells on your computer. In a browser, they are the shells on the computer that runs the Termul server.
| Platform | Shells Termul looks for |
|---|---|
| Windows | PowerShell 7, PowerShell (Windows PowerShell), Command Prompt, WSL, Git Bash |
| macOS and Linux | Bash, Zsh, Fish, Shell (sh) |
On Windows, Command Prompt and WSL are always in the list, even if WSL is not installed.
On macOS and Linux, Termul looks only in /bin and /usr/bin. A shell installed somewhere else, for example by Homebrew, is not in the menu. To use one, create a terminal profile and type the shell's path.
If the project has a default shell, the menu lists it first and marks it (default).
Set the default shell
The default shell is the shell Termul uses when you don't pick one, for example when you run New Terminal from the command palette. There is a default for all projects and a default for each project.
To set the default for all projects:
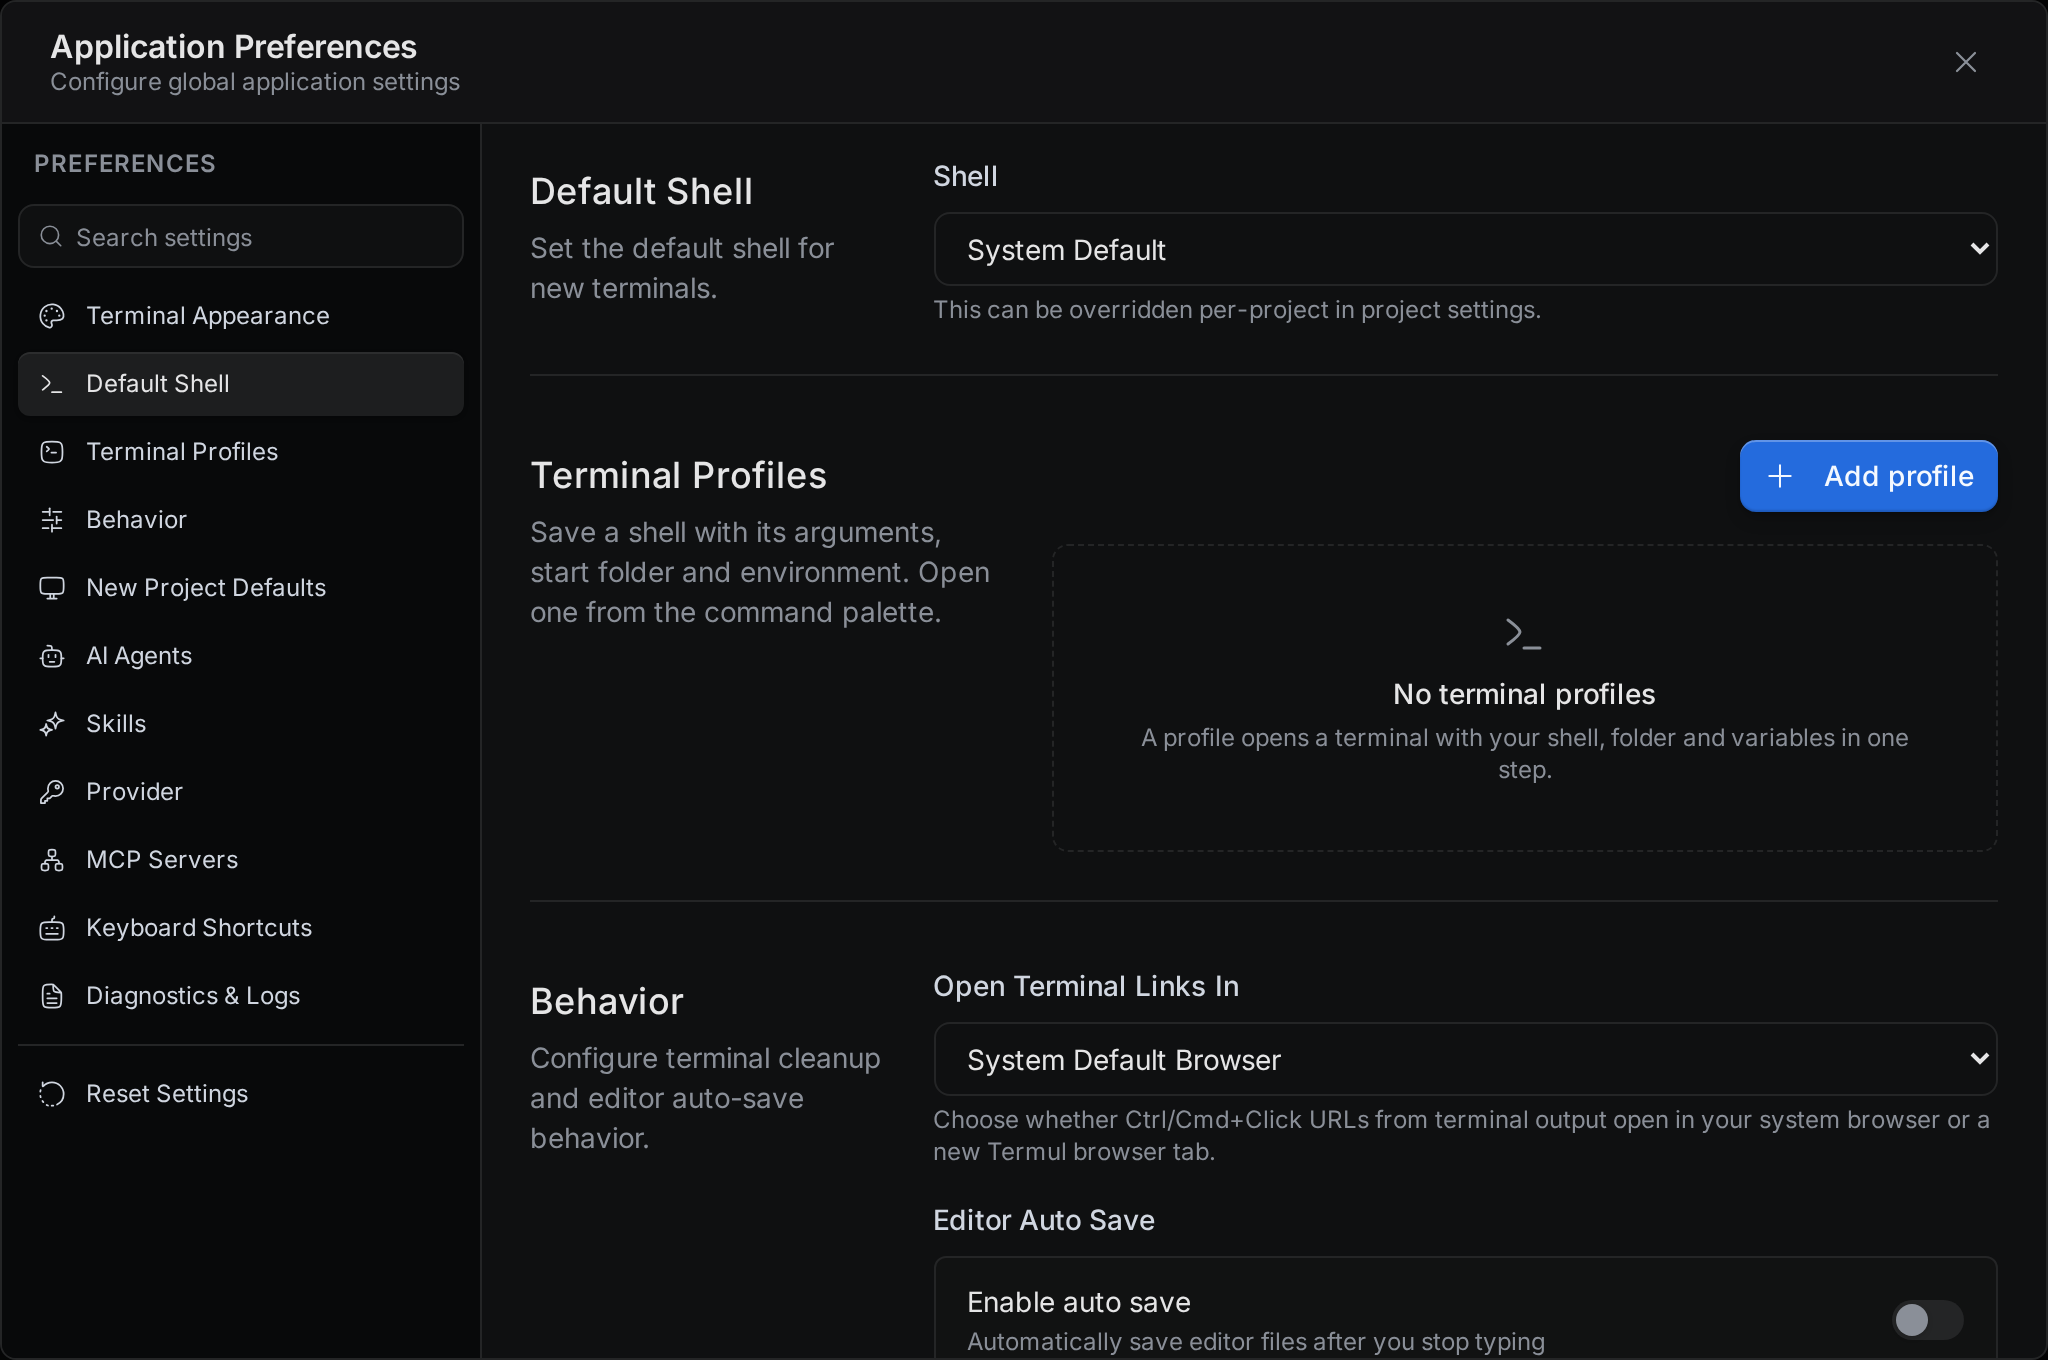
- Select Settings at the bottom of the projects rail, or press
Ctrl+,(Cmd+,on macOS,Alt+,in a browser). - Select Default Shell.
- Choose a shell from Shell. System Default uses your system's default shell.
To set the default for one project:
- Hover the project in the projects rail and select the gear icon (Project settings).
- Under Shell Settings, choose a shell in Default Shell.
- Select Save Changes.
When you create a project, Advanced options in the new project dialog has a Default Terminal field. It sets the same per-project default. Termul fills in this field for you, so every project you create there starts with its own default shell.
Termul picks the shell for a new terminal in this order:
- The shell you select in the + menu.
- The project's default shell.
- The default shell in Settings.
- Your system's default shell.
Because projects you create in Termul already have a default shell, the Settings default applies only to projects without one. To change the shell for an existing project, change it in Project settings.
Save a terminal profile
A terminal profile is a saved shell setup. It has a shell, its arguments, a start folder, and environment variables. Use a profile when you often open the same kind of terminal, such as a shell with NODE_ENV=development set.
- Open Settings and select Terminal Profiles.
- Select Add profile.
- Fill in the fields you need:
- Name. The name of the profile and of the tabs it opens. This field is required.
- Shell. Pick a shell from the list. To use another shell, pick Other path or name and type a shell name or path in Shell path or name, for example
nuorC:\tools\nu.exe. Leave the field on Default shell to use the default shell. - Arguments. Type one argument per line. To add arguments, you must also choose a shell.
- Start folder. Leave it empty to start in the active project or worktree folder. If you fill it in, type a full path.
- Environment variables. Type one
KEY=valueper line. These variables override project environment variables that have the same name.
- Select Save.
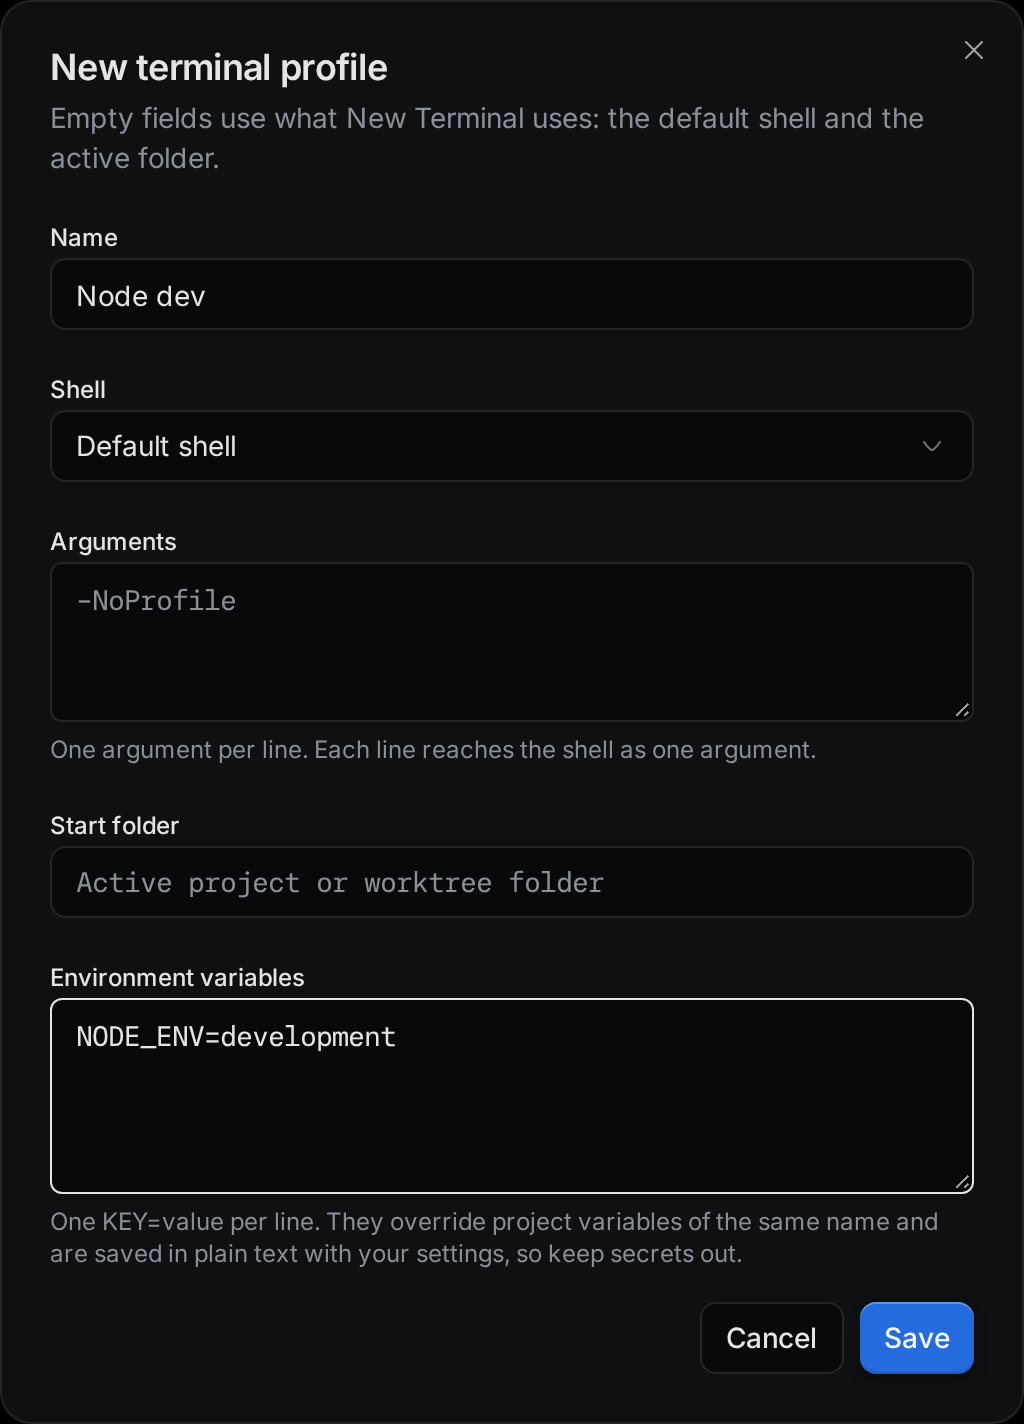
Termul saves profile environment variables in plain text with your settings. Don't put passwords or tokens in them.
To change a profile, select its pencil icon. To remove it, select its trash icon. Termul deletes the profile right away, without asking.
Open a terminal from a profile
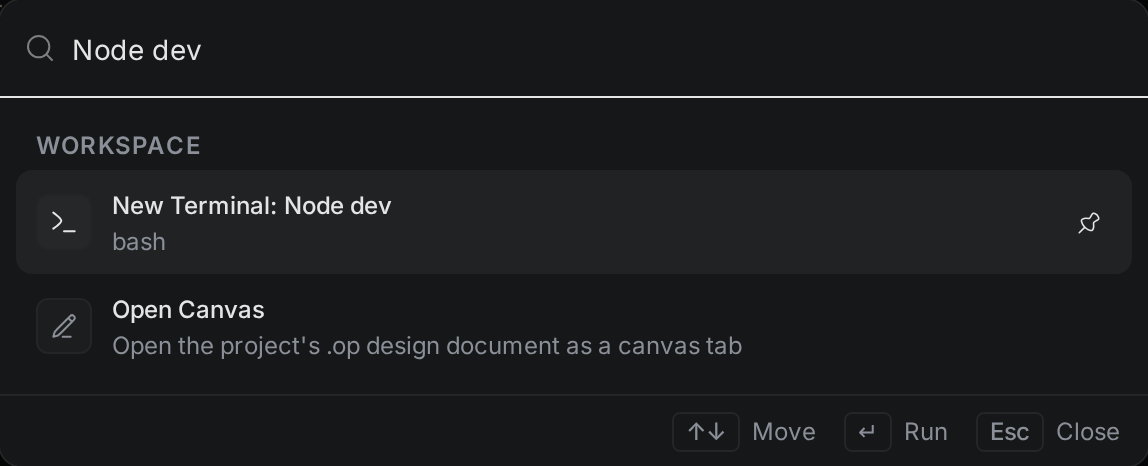
- Open the command palette with
Ctrl+K(Cmd+Kon macOS). - Type the profile name.
- Select New Terminal: profile name.
The terminal opens in the active pane, and the tab has the profile's name. Profiles are not in the + menu.
Terminal limits
A project can have 10 terminals open at once, and Termul as a whole can have 30. Terminals that keep running in the background count toward both limits. When you reach a limit, Termul shows a message such as "Terminal limit reached (10 per project, 30 total): this project is at its limit" and doesn't open the terminal. Close a terminal to open a new one.
To change the per-project limit, set the TERMUL_MAX_TERMINALS_PER_PROJECT environment variable to a number before you start Termul. If you run Termul as a server, you can also use the --max-terminals-per-project flag. The total limit of 30 doesn't change.