Worktrees
Work on several branches at once, each in its own folder.
A worktree is a second folder of the same Git repository, with its own branch checked out. You can edit, run, and commit in each folder without touching the others.
Use a worktree when you want to:
- Let an agent work on a task while you keep working in your own checkout.
- Try an idea on a new branch without stashing your current work.
- Run two agents on two tasks at the same time.
Termul puts each worktree in .termul/worktrees/<name>/ inside your project folder. It also adds .termul/ to the project's .gitignore, so the worktrees never show up as changes.
Create a worktree
- Do one of these:
- Right-click the project in the projects rail and click New Worktree.
- Press
Ctrl+Shift+Alt+N(Cmd+Shift+Option+Non macOS).
- Type a Name, for example
try-new-hero. Termul uses it for the folder and for a new branch. - Optional: check Path Preview to see where the folder goes.
- Click Create & open, or press
Enter.
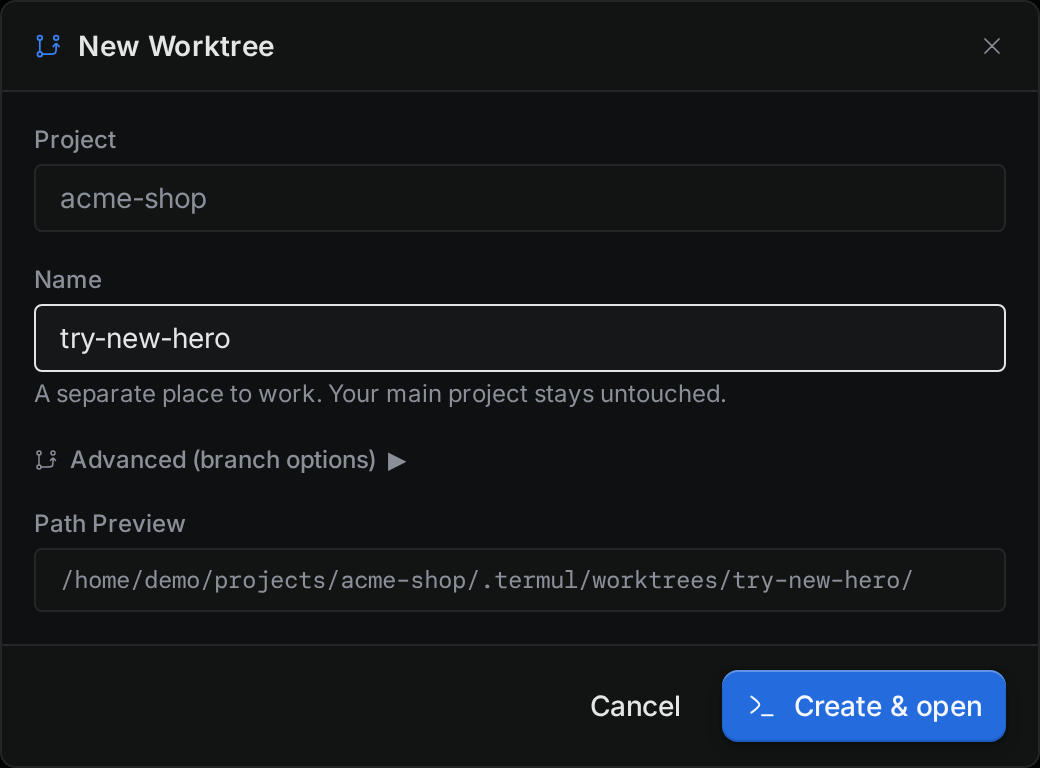
Termul creates the worktree and opens a terminal in it. The new branch starts from the commit your project folder has checked out.
The project must be a Git repository. If it is not, New Worktree is disabled in the menu.
Pick the branch
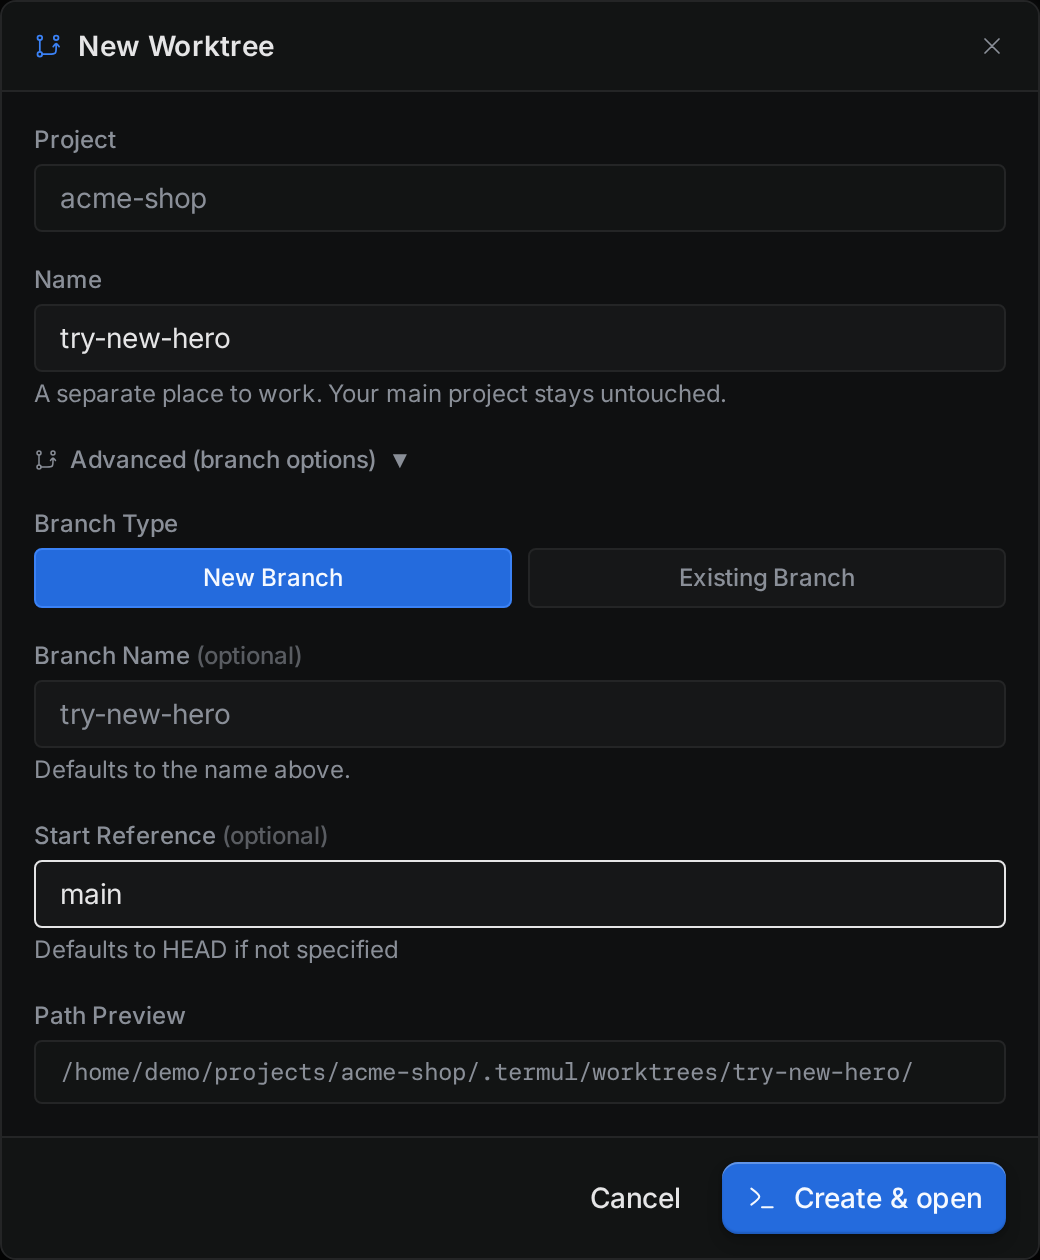
Click Advanced (branch options) to choose the branch yourself:
- New Branch creates a branch. Type a name in Branch Name (optional), or leave it empty to use the worktree name. In Start Reference (optional), type a branch name or a commit hash to start from. Leave it empty to start from the current commit.
- Existing Branch checks out a branch you already have. Search the list and click a branch. Select Show remote branches to see branches from the remote too.
Termul replaces spaces and other characters that Git does not allow in branch names with -.
A branch can be checked out in only one folder at a time. If the branch already has a worktree, Termul tells you so.
Create a worktree from the switcher
- Click the Workspace button at the top of the side panel.
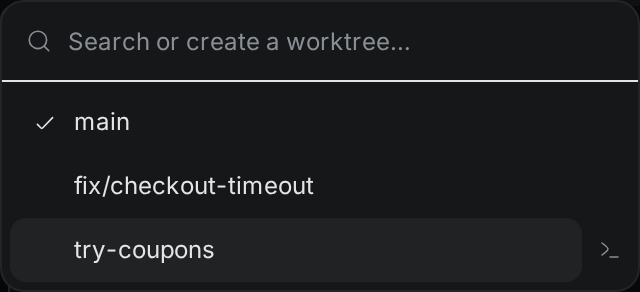
- Type a name in Search or create a worktree… that matches no existing worktree.
- Click Create worktree followed by the name.
Termul creates a new branch with that name, starting from the current commit, and switches to the worktree. It does not open a terminal.
Give an agent its own worktree
When you start a chat, you can make the agent work in a worktree instead of your project folder. Your own files stay as they are while the agent edits.
- Click New chat.
- Below the prompt box, open the Workspace menu. It shows Current checkout by default.
- Pick one of these:
- New worktree creates a fresh worktree for this chat. Pick the Base branch to start from. Termul selects the repository's default branch for you, such as
main. - Existing worktree runs the agent in a worktree you already have. Pick it in the Worktree menu.
- New worktree creates a fresh worktree for this chat. Pick the Base branch to start from. Termul selects the repository's default branch for you, such as
- Type your prompt and send it.
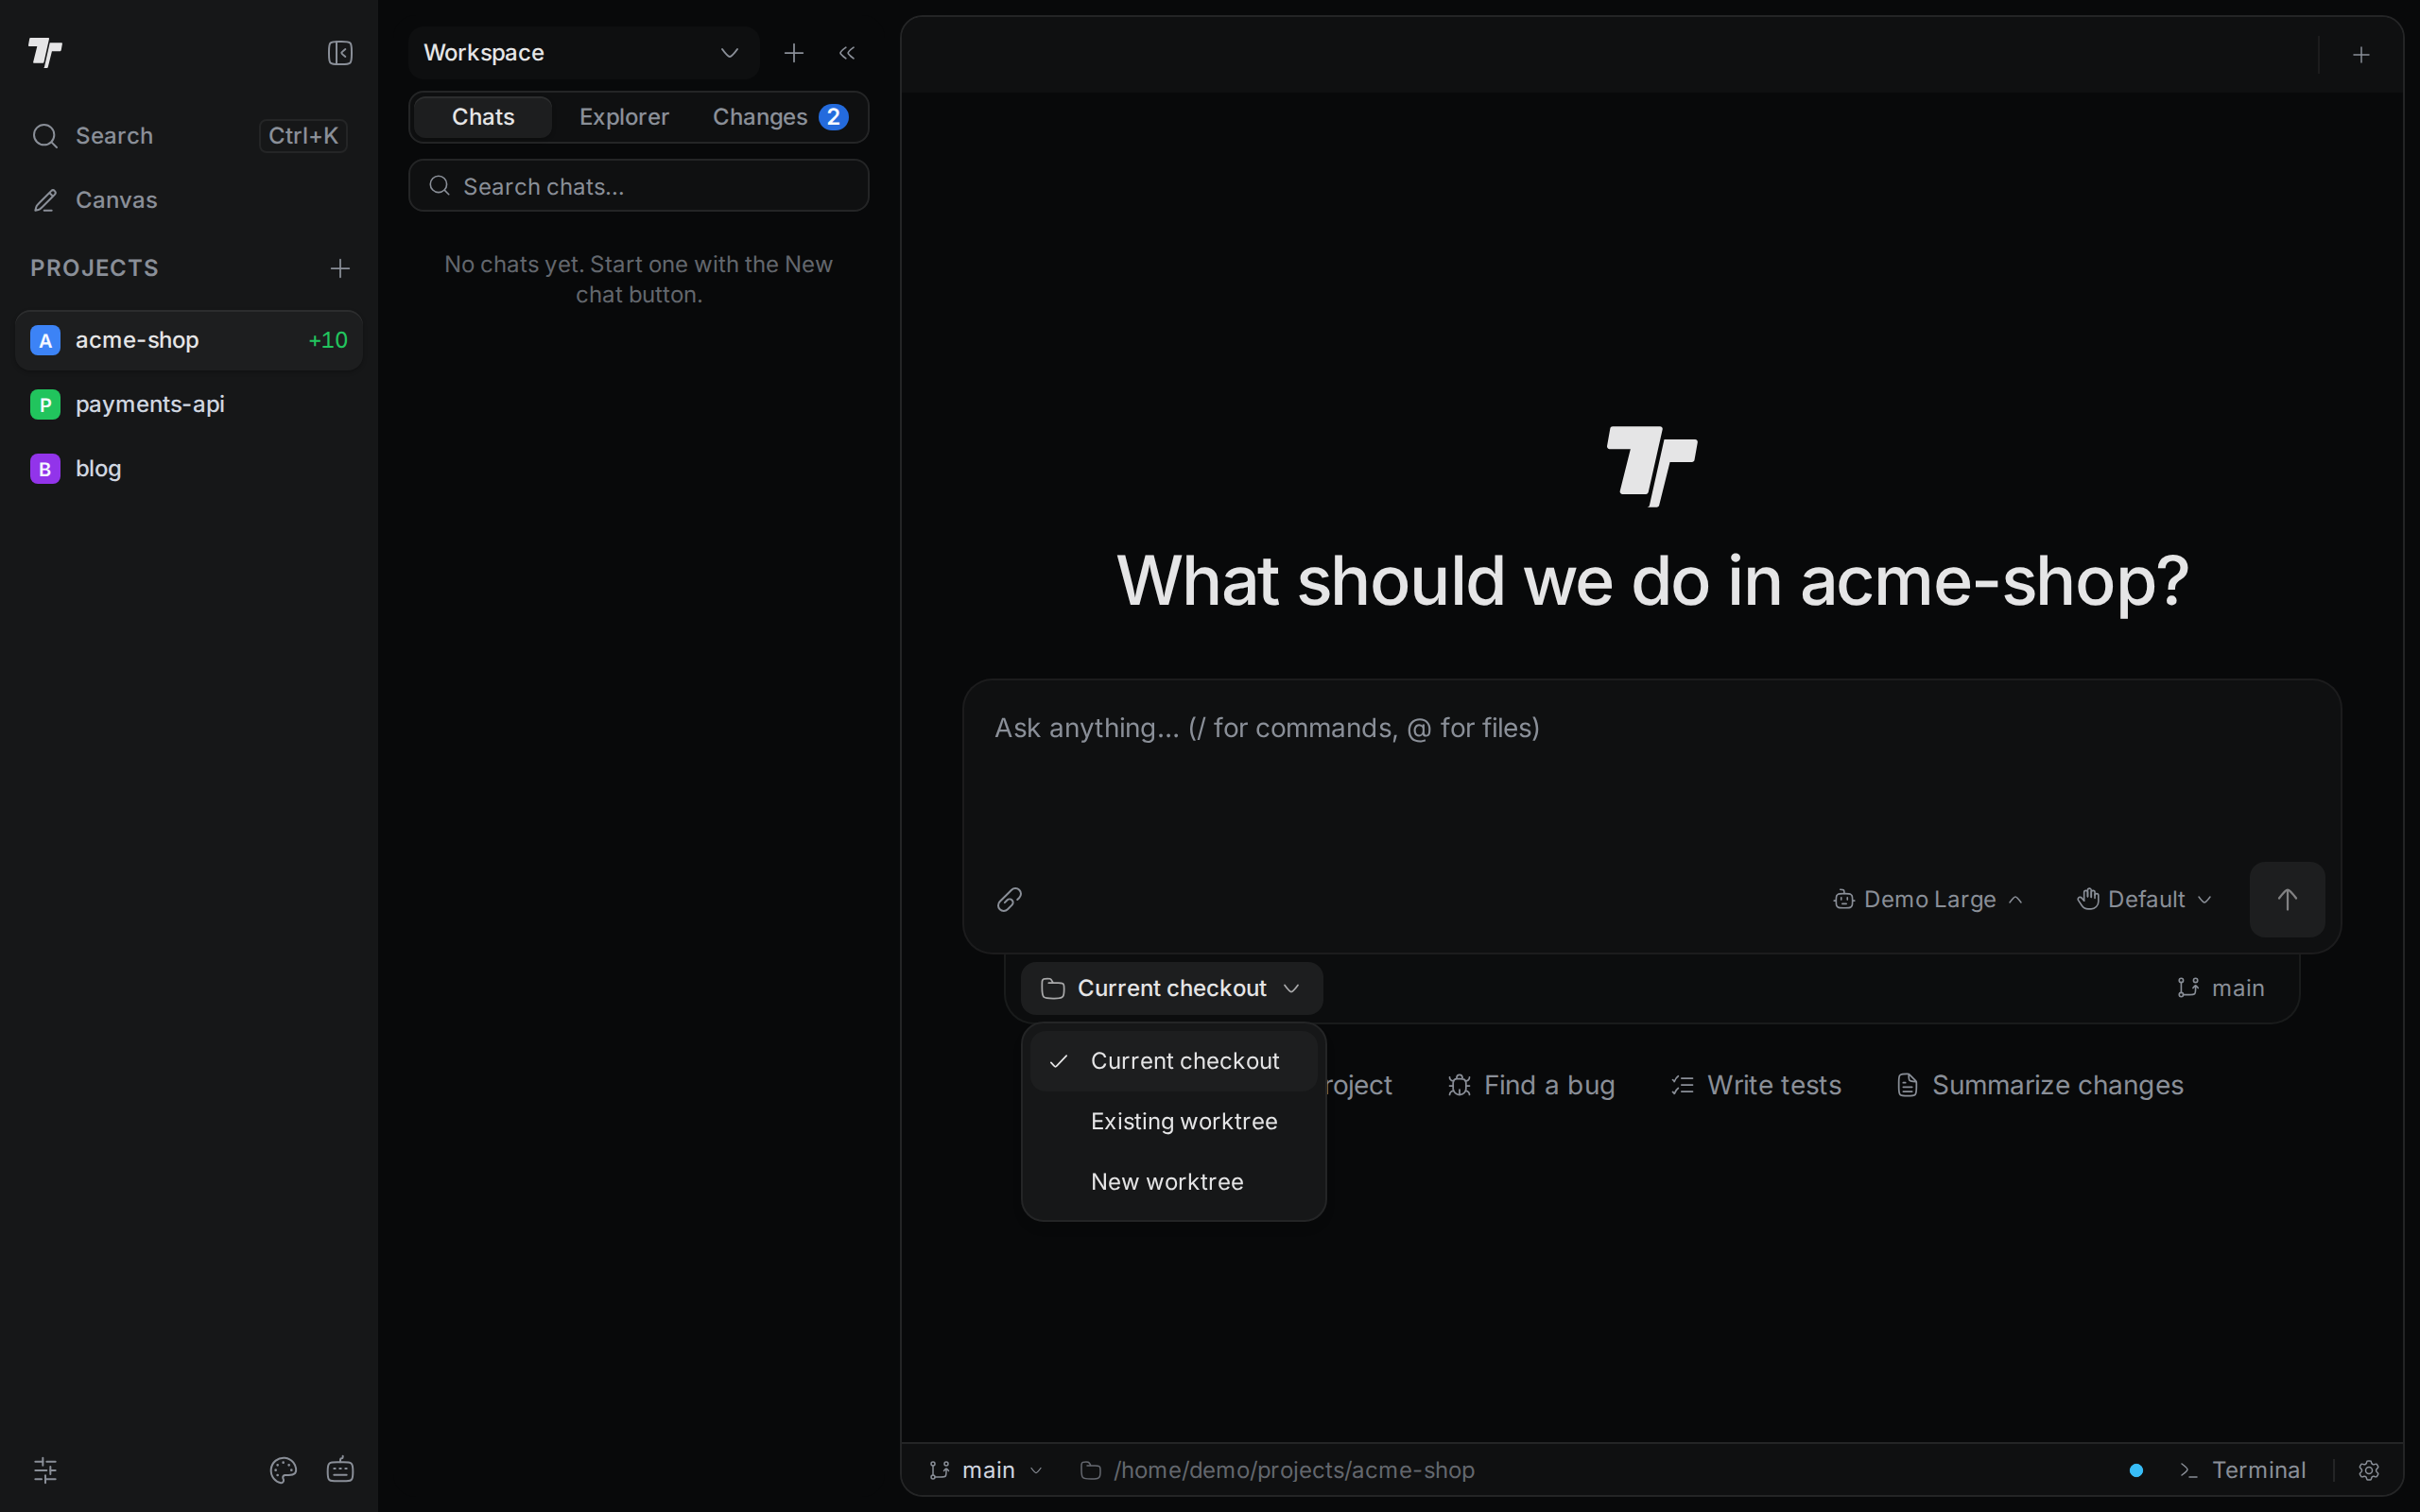
A new worktree for a chat gets a branch named chat/ followed by a short id. When the agent gives the chat a title, Termul may rename the branch to match the title. The folder keeps its name.
The chat shows Worktree below its prompt box when the agent works in a worktree, and Current checkout when it edits your project folder.
Switch between worktrees
The Workspace button at the top of the side panel shows which folder you are looking at. It reads Workspace for the project folder, or the branch of the worktree you picked.
- Click the Workspace button.
- Click a worktree. The first row is the project folder, shown by its branch name. Click it to go back. You can also type to filter the list, then use the arrow keys and
Enter.
Switching changes what these show:
- The Chats tab lists only the chats of that worktree. The project folder lists all chats.
- The Changes tab shows the changes, branch, and stashes of that worktree.
- New chat offers that worktree as its Workspace.
Switching does not close or move your open tabs, terminals, or running agents. A dot next to a worktree means a chat or terminal in it is busy. The number is how many tabs you have open in it.
Termul lists every worktree of the repository, also the ones you created with Git outside Termul. It checks for new ones every minute.
Keyboard shortcuts for worktrees
| Shortcut | What it does |
|---|---|
Ctrl+Shift+Alt+N | Open the New Worktree dialog. |
Ctrl+Shift+Down | Switch to the next worktree. |
Ctrl+Shift+Up | Switch to the previous worktree. |
Ctrl+Shift+Home | Switch back to the project folder. |
Ctrl+Shift+Alt+T | Open a terminal in the worktree you picked. |
On macOS, press Cmd instead of Ctrl. To change these keys, open Settings and go to Keyboard Shortcuts.
Open a terminal in a worktree
In the switcher, hover over a worktree and click the terminal icon. Or right-click the worktree and click Open Terminal Here. The terminal opens in the current pane, and the switcher keeps its selection.
Share folders with symlinks
A new worktree has only the files that Git tracks. Folders that Git ignores, like node_modules, are missing. Instead of installing them again in every worktree, Termul can link them to the project folder. A link (a symlink) makes the folder appear in the worktree while the files stay in one place.
To choose the linked folders:
- Right-click the project in the projects rail and click Settings.
- In the Project Settings window, click Worktree Symlinks.
- Click Sync from .gitignore to add the folders listed in your
.gitignorethat exist in the project. Or click Add Directory and type a folder name, for examplenode_modules. - To remove a folder, click the X next to it.
- Click Save Changes.
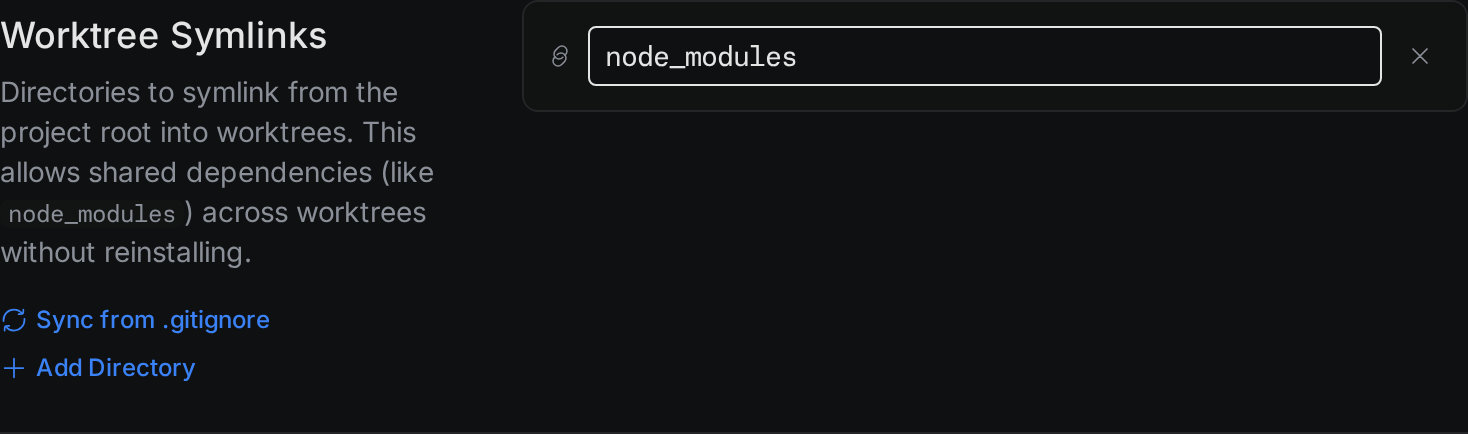
Each entry must be one folder name at the top of the project, with no / in it. If the list is empty, Termul fills it from .gitignore when you open the page. Termul does not keep that list until you click Save Changes.
Termul links every folder in the list into every worktree. It checks every minute and adds links that are missing.
Copy files into new worktrees
Some ignored files must be real copies, not links. An example is a .env file that each worktree changes. List them in a file named .worktree-include in your project folder. Termul copies the matching files into each worktree that New chat creates.
# Copy local settings into new chat worktrees
.env
config/local.json
**/.env.local- Write one pattern per line. Termul ignores empty lines and lines that start with
#. - A pattern matches the path from the project folder.
.envmatches only the.envat the top. Use**/.envto match it in every folder. *matches any characters except/.?matches one character. A pattern that ends with/matches everything in that folder.- Termul never overwrites a file that already exists in the worktree. It skips
.git,.termul,node_modules,target, anddist.
Only worktrees that New chat creates get these copies. The New Worktree dialog and the switcher do not copy .worktree-include files.