Branches and stashes
Switch, find, and create branches, and put unfinished work aside.
Switch to another branch or start a new one without leaving Termul. When you are not ready to commit, stash your changes to put them aside and bring them back later.
Switch branches from the context bar
The context bar at the bottom of the window shows the current branch. This picker has a search box, so use it when you have many branches.
- Click the branch name in the context bar.
- Type part of a name in Search branches to shorten the list.
- Click a branch.
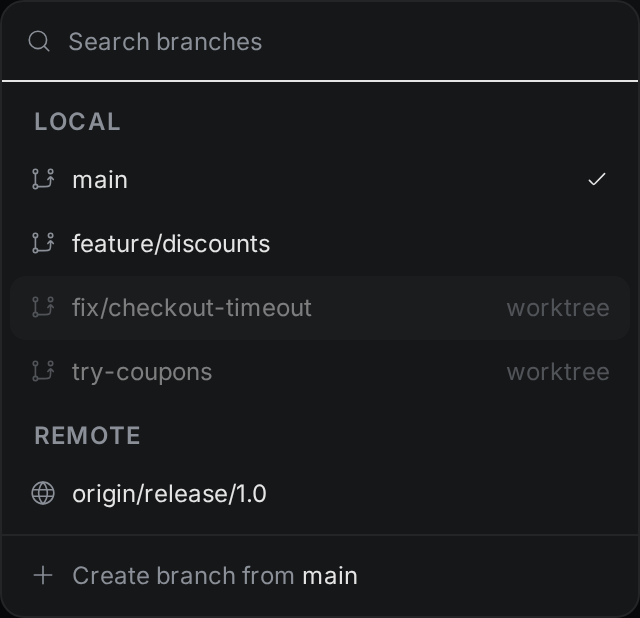
The picker shows two groups:
- Local lists your branches. The current branch has a check mark and comes first.
- Remote lists branches that exist only on the remote. Click one to create a local branch with the same name that tracks it.
A branch marked worktree is checked out in another worktree. You cannot switch to it here. See Worktrees.
If you do not see the branch name in the context bar, click Context bar settings (the gear at the right end of the bar) and turn on Git Branch.
This picker does not stash your changes for you. If you have uncommitted changes, Git carries them to the other branch. If they conflict with the other branch, Git refuses and Termul shows the error.
Switch branches from the Changes tab
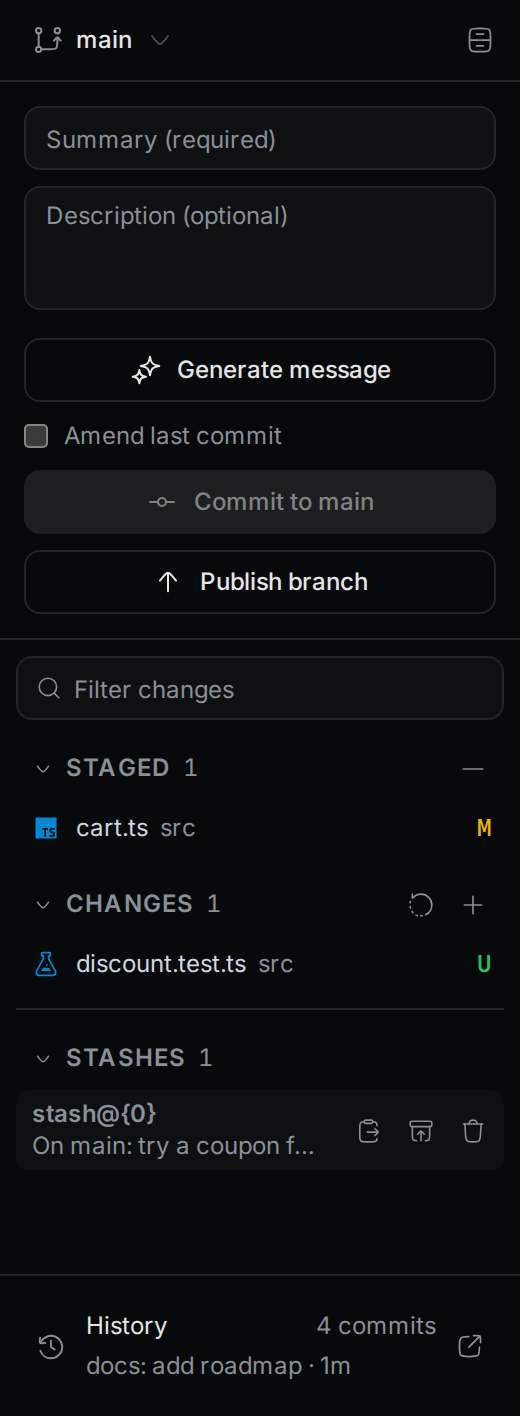
The branch name at the top of the Changes tab also opens a branch menu. It lists all branches, including remote ones, but has no search box.
If you have uncommitted changes, Termul asks what to do with them:
- Bring Changes keeps your changes and carries them to the new branch.
- Stash & Switch stashes your changes, switches, and then applies them again on the new branch. If they do not apply cleanly, they stay in the stash and Termul tells you so. See Stash your changes.
- Cancel stays on the current branch.
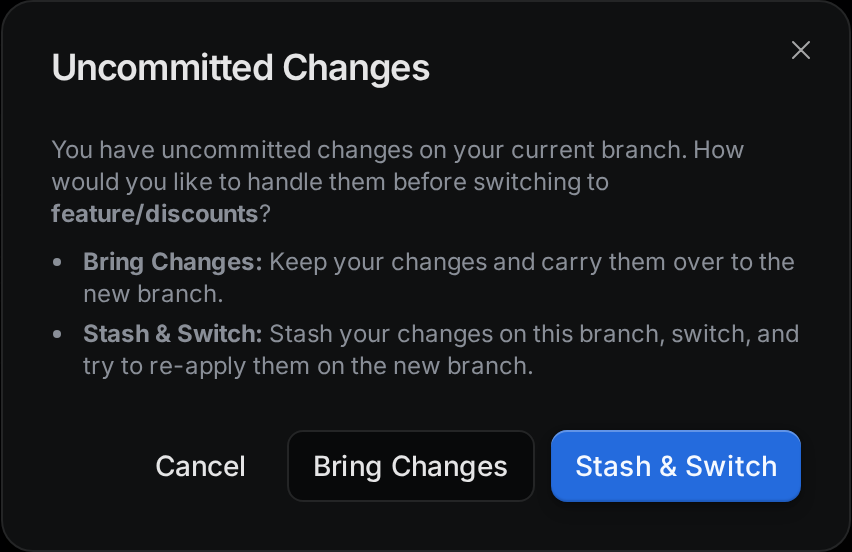
New files count as uncommitted changes here.
Create a branch
A new branch starts from the commit you have checked out. Termul switches to it right away. Your uncommitted changes come with you.
From the context bar:
- Click the branch name in the context bar.
- Click Create branch from followed by the current branch name.
- Type the name and press
Enter, or click Create. PressEscapeto cancel.
Termul replaces spaces and other characters that Git does not allow with -.
From the Changes tab:
- Click the branch name at the top of the tab.
- Click Create new branch....
- Type a name in Branch name, for example
feature/new-login. - Click Create & Switch.
You cannot switch while an agent is working
While an agent is working in a checkout, Termul does not switch the branch of that checkout, because a switch would change the files the agent is editing. Termul shows an error and stays on the current branch.
Wait for the agent to finish, or stop its turn, and then switch again. To keep working on another branch while the agent runs, use a worktree.
If you chose Stash & Switch and the switch was refused, your changes stay in the stash. Apply or pop the stash to get them back.
Stash your changes
A stash saves your uncommitted changes and removes them from your files. Later you apply the stash to bring the changes back, on this branch or another one.
- Click Stash changes (the box icon next to the branch name at the top of the Changes tab).
- Optional: type a message, so you can recognize the stash later.
- To stash new untracked files too, select Include untracked files. Without it, new files stay where they are.
- Click Stash.
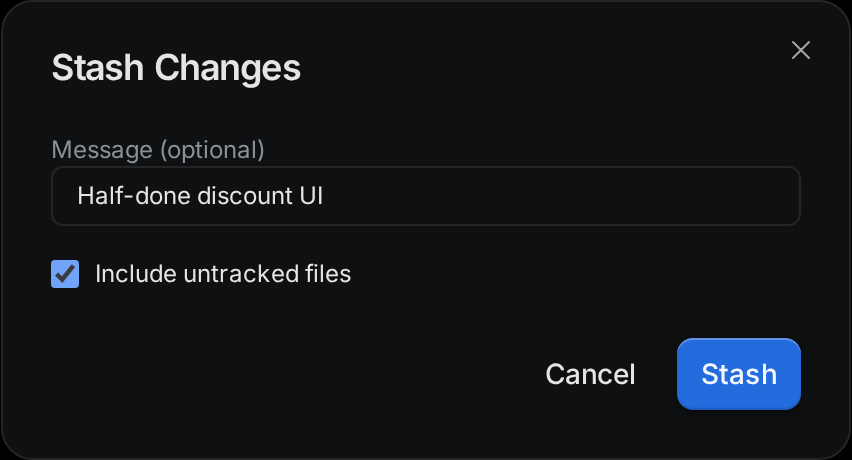
The button is disabled when there is nothing to stash.
Apply, pop, or drop a stash
Your stashes are listed in the Stashes section of the Changes tab, newest first. Each one shows its name, such as stash@{0}, and its message. Hover over a stash to see its buttons:
- Apply stash (keeps stash entry) brings the changes back and keeps the stash, so you can apply it again.
- Pop stash (applies and drops) brings the changes back and deletes the stash.
- Drop stash deletes the stash without applying it.
Drop stash does not ask for confirmation. The stash is gone right away.